


Spoiler‑light checklist to secure eight early Mask Shards. Four shards combine into +1 Mask (permanent max HP). This follows the video route and cross‑checks with major guides.
Overview
This guide mirrors “All Mask Shard Locations Part 1 (1–8)” and consolidates details from reliable sources. It focuses on quick, low‑friction unlocks you can tackle with early mobility. Expect frequent use of Swift Step (dash), Drifter’s Cloak (glide), and Cling Grip (wall jump).
TL;DR — Shards 1–8
- Bone Bottom shop — purchase for ≈300 Rosaries.
- Far Fields above the Seamstress — glide up and drop a coal to break the floor; shard below.
- Wormways hidden pool — outrun the acid‑beast, then break the right wall in the tall pool room.
- Shellwood secret — crack the upper‑right wall in Shakra’s shaft; clear the flower‑pogo corridor.
- Deep Docks trial — combat waves behind a gate on the Marrow → Docks line (Cling Grip helps).
- Grand Hunt (Bellhart/Far Fields) — take Savage Beastfly, turn in for a shard.
- Citadel shard — after Cogwork Dancers, left‑side route linking Cogwork Core → Choral Chambers.
- Songclave shop — unlock the wandering merchant; buy for ≈750 Rosaries.
Tip: Use an interactive map and filter “Mask Shards” to place personal pins for every stop.
Step‑by‑Step Locations
- Bone Bottom — Shop Purchase (≈300 Rosaries)
- Where: General shop in Bone Bottom sells a Mask Shard.
- Why first: Guaranteed and fast—ideal to start your health path.
- Far Fields — Above the Seamstress (Drifter’s Cloak)
- Unlock: Complete the Seamstress to gain Drifter’s Cloak.
- Route: Blow magma plugs to raise gusts, glide to the top‑left exit, then drop a ceiling coal to blast a hole—shard is below.
- Wormways — Hidden Pool Room
- Route: From Mosshome toward Wormways, cross the upper gap (enemy‑pogo or return with Swift Step).
- Find: After the chase, in the tall pool room, drop into water and break the right wall.
- Shellwood — Shakra/Flea Shaft Secret
- Route: In the tall central shaft near Shakra, jump to upper‑right and break the wall.
- Trial: Navigate a white‑flower pogo corridor; shard sits beyond.
- Deep Docks — Combat Trial
- Entry: From The Marrow into Deep Docks; climb high‑right to the gate.
- Trial: Clear waves, then head right to collect the shard. Cling Grip required; gliding helps.
- Bellhart / Far Fields — Grand Hunt: Savage Beastfly
- Board: After cleansing Bellhart, pick the Savage Beastfly hunt.
- Reward: Defeat the beast, bring the Horn Fragment to the board to receive a shard.
- Cogwork Core → Choral Chambers — Left‑Path Gauntlet
- After the Cogwork Dancers, drop and keep left through a collapsing‑floor run.
- Take the top‑left into Choral Chambers to claim the shard.
- Choral Chambers — Songclave Merchant (≈750 Rosaries)
- Found Songclave (ring the First Shrine), progress the wandering merchant quest.
- Buy the shard from Jubilana once her shop is active.
Requirements & Prep
- Common abilities: Swift Step (dash), Drifter’s Cloak (glide), Cling Grip (wall jump).
- Currency: Bring ≈300 Rosaries (Bone Bottom) and ≈750 Rosaries (Songclave) if you’re purchasing both.
- Navigation: Use pins to track returns and shard nooks.
FAQ
- How many shards per Mask? Four shards combine to add +1 Mask (max HP).
- Alternate orders? Some lists include Weavenest Atla early; this route sticks to the linked video flow.
Sources
- Video: https://www.youtube.com/watch?v=uBs2uQ36Y2I
- Cross‑checked against PCGamesN, GameSpot, Nintendo Life, and interactive map resources for prices, routes, and room specifics.
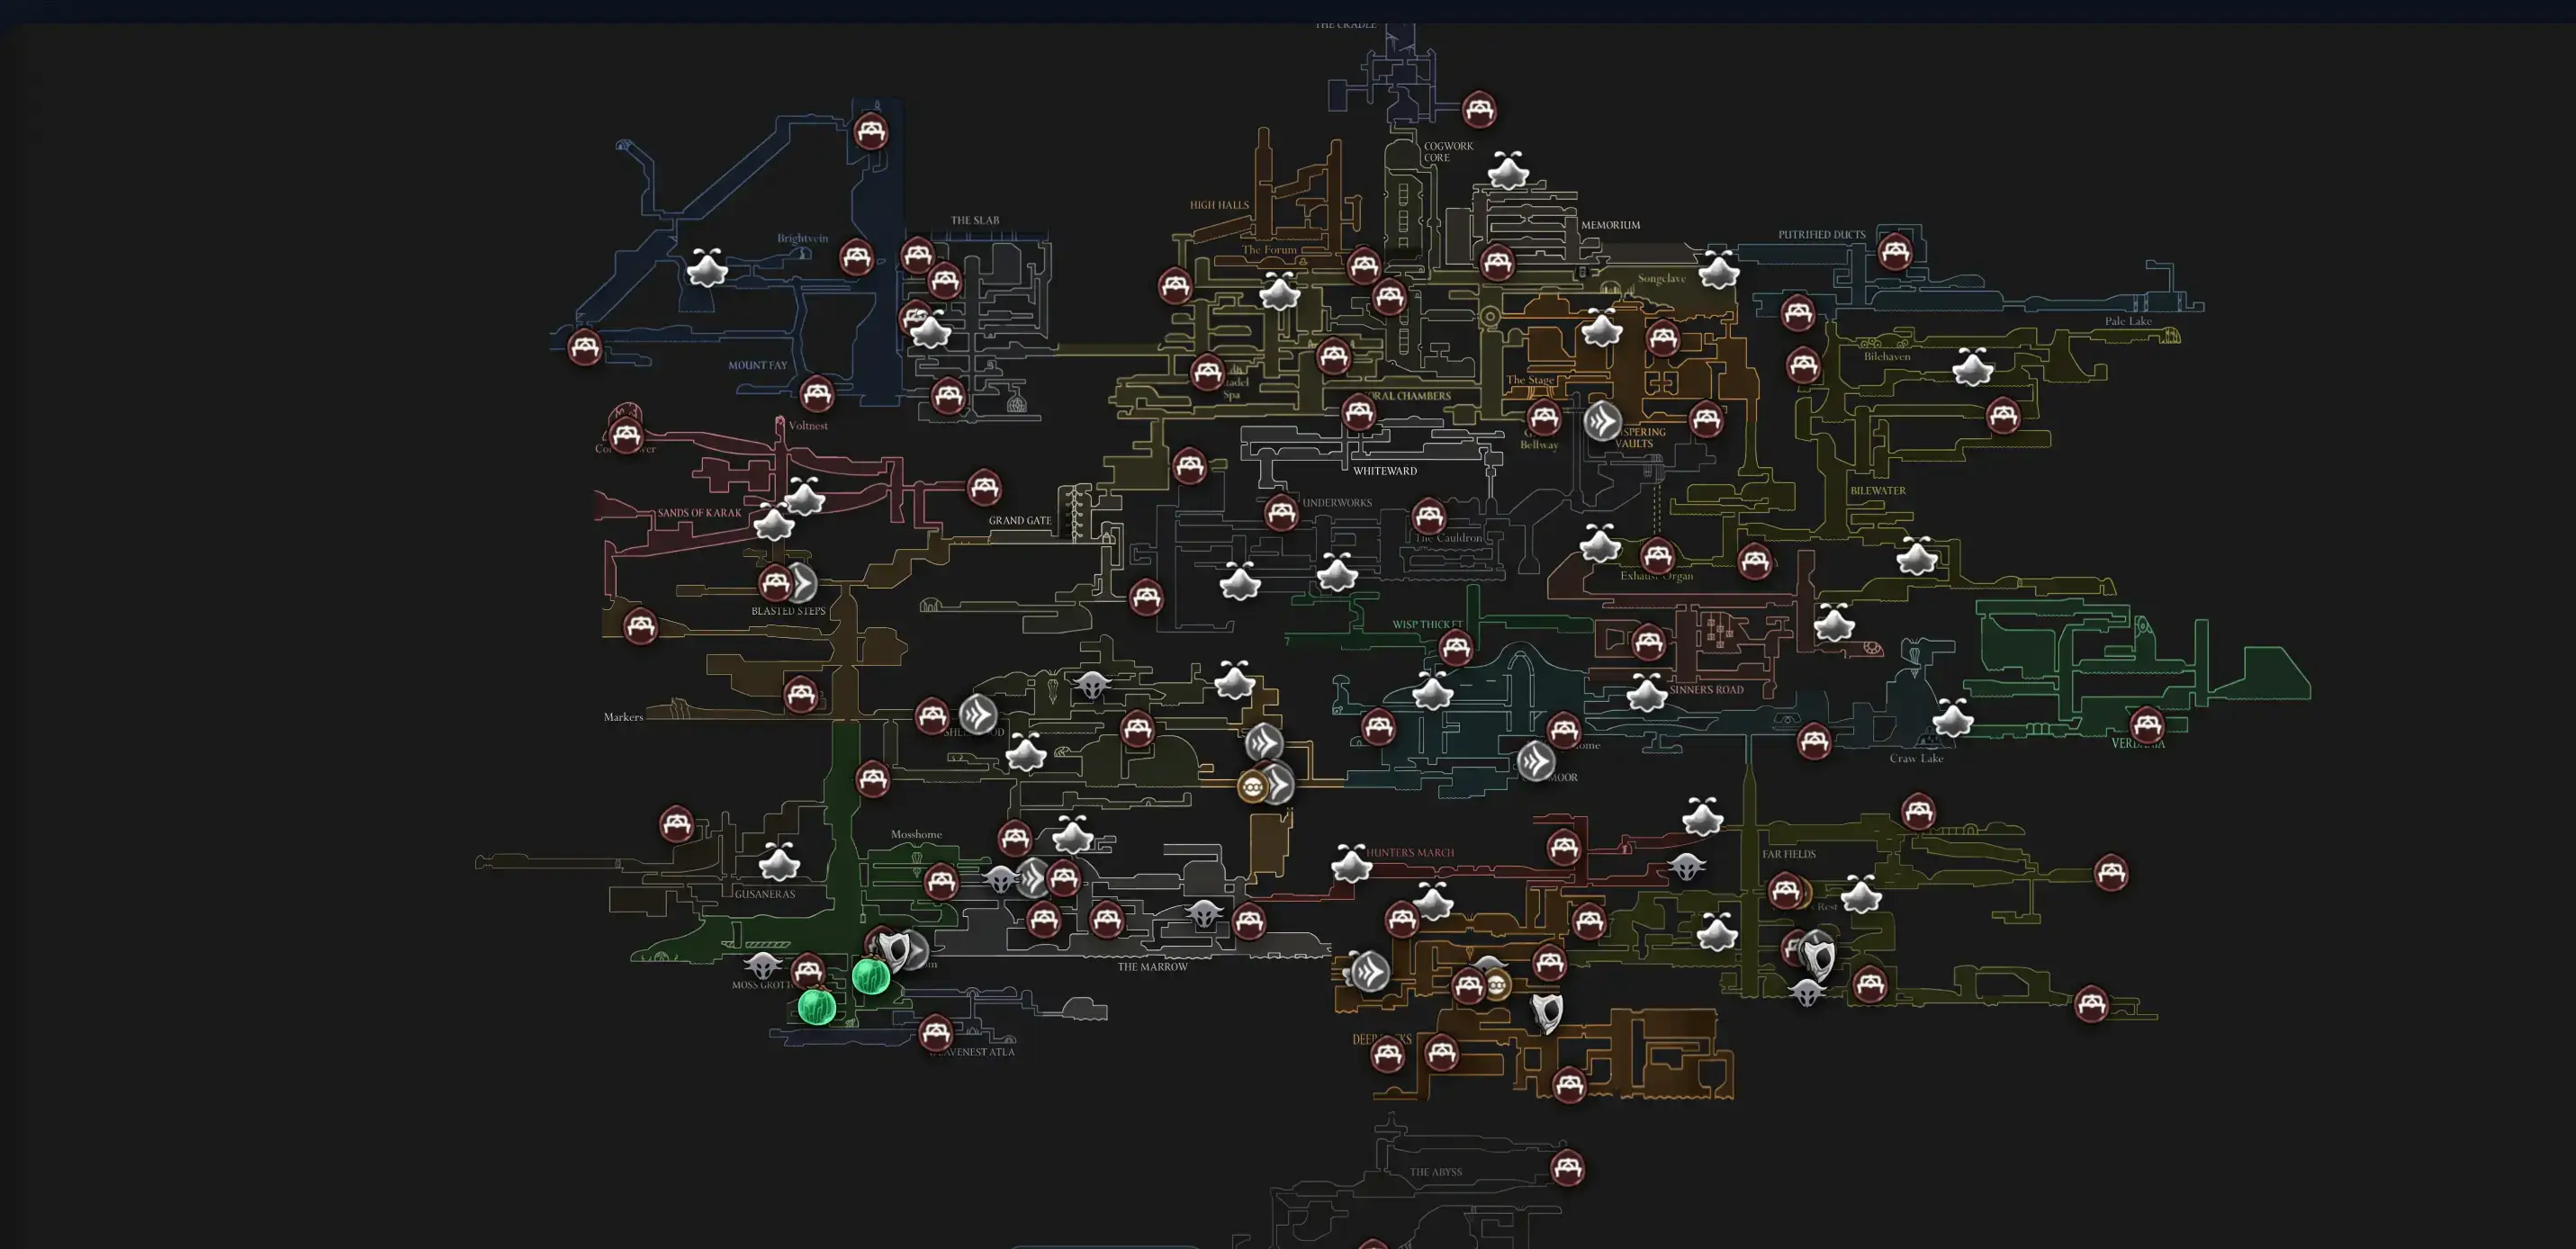
Open Interactive Map (All Areas)
Opens the full interactive Silksong map in a new tab.