


Optional duo encounter in Weavenest Atla. Defeating them awards Weavelight, a Blue Tool that increases Silk regeneration speed.
Summary
- Where: Weavenest Atla (an offshoot connected from the east side of Moss Grotto); some routes mention a Needolin door on approach.
- What: Two‑on‑one rematch against Moss Mother; kill the duo to receive Weavelight.
- Reward: Weavelight (Blue Tool) that speeds Silk regeneration.
Location & Route (Step‑by‑Step)
- Enter Weavenest Atla from Moss Grotto (east approach). Some references call out a Needolin door on this route.
- Go right to a tall room with two ceiling switches; hit both, then collect the Weavenest Atla map in the prior room and ride the elevator/teleporter down.
- At the bottom, head left to a bench. Jump into the pond beside it and press through the left wall (hidden passage) into Moss‑Grotto‑style caves.
- Continue left, clear the rhino‑beetle blocking a low path, then proceed into the arena for the Double Moss Mother fight.
Moveset → What’s Different in the Duo
- Sliding Sting: Fast horizontal rush along the ground. Pogo over the charge to keep DPS while staying safe.
- Ceiling Slam → Hazards: Leap triggers either falling rocks (telegraphed by dust from above) or spawns caterpillars that clutter the floor.
With two bosses, expect overlapping Stings and staggered Slams. The tight stage rewards vertical control (short hops, downward slashes) and discipline.
Strategy — Safe & Consistent
- Keep them same‑side. Bait both to one wall, then hop/pogo through the first Sting to stack them; reduces cross‑fire and clarifies rock telegraphs.
- Read dust cues. On ceiling shakes, look for falling‑dust markers and slide into safe gaps before rocks drop.
- Triage “adds.” If caterpillars spawn, clear the ones boxing you in, then refocus bosses—space > full clear.
- Win with verticals. Short hops + pogos over Stings deal damage safely; up‑slashes tag a hovering mother between cycles.
- Bind timing. Heal after Slams or while both are screen‑edge recovering. Blue Tools that protect/refill Silk smooth this window.
Recommended Loadouts
- Druid’s Eye (Blue Tool): Generates recoverable Silk on hit—stabilizes binds in a chaotic arena.
- Warding Bell (Blue Tool): Reduces damage while healing once per encounter—great for a guaranteed bind.
- Screen control: Curveclaw/Sting Shard to clip adds and tag pass‑bys. Use what you’ve acquired.
Weavelight pairs well later with Hunter Crest for very fast Silk regen, per community reports.
Rewards
- Weavelight (Blue Tool): “Gleaming apparatus of Weaver make… increases the speed of Silk regeneration.”
Tips & Common Mistakes
- Don’t split them—stack both to one side to avoid cross patterns.
- Don’t tunnel during rock rain—watch dust, move first, then DPS.
- Keep heals short—use Warding Bell or post‑slam lulls.
FAQ
- Missable? Treated as an optional Weavenest Atla encounter; doing it early secures Weavelight.
- Charm or Tool? Tool. Silksong replaces charms with Tools; Weavelight sits in the Blue slot system.
- Other pickups nearby? Weavenest Atla guides flag benches, a map, and fragments along this route.
Sources
- Video: https://www.youtube.com/watch?v=fv7QOsV8o7k
- Game8 (Weavelight location/effect), Nintendo Life (Tools list), TheGamer (Weavenest route notes), Into Indie Games / AllThings.How (switches/map/elevator; bench → pond → hidden wall), GameSpot/Game8 (Moss Mother kit), community wiki (Needolin door mention).
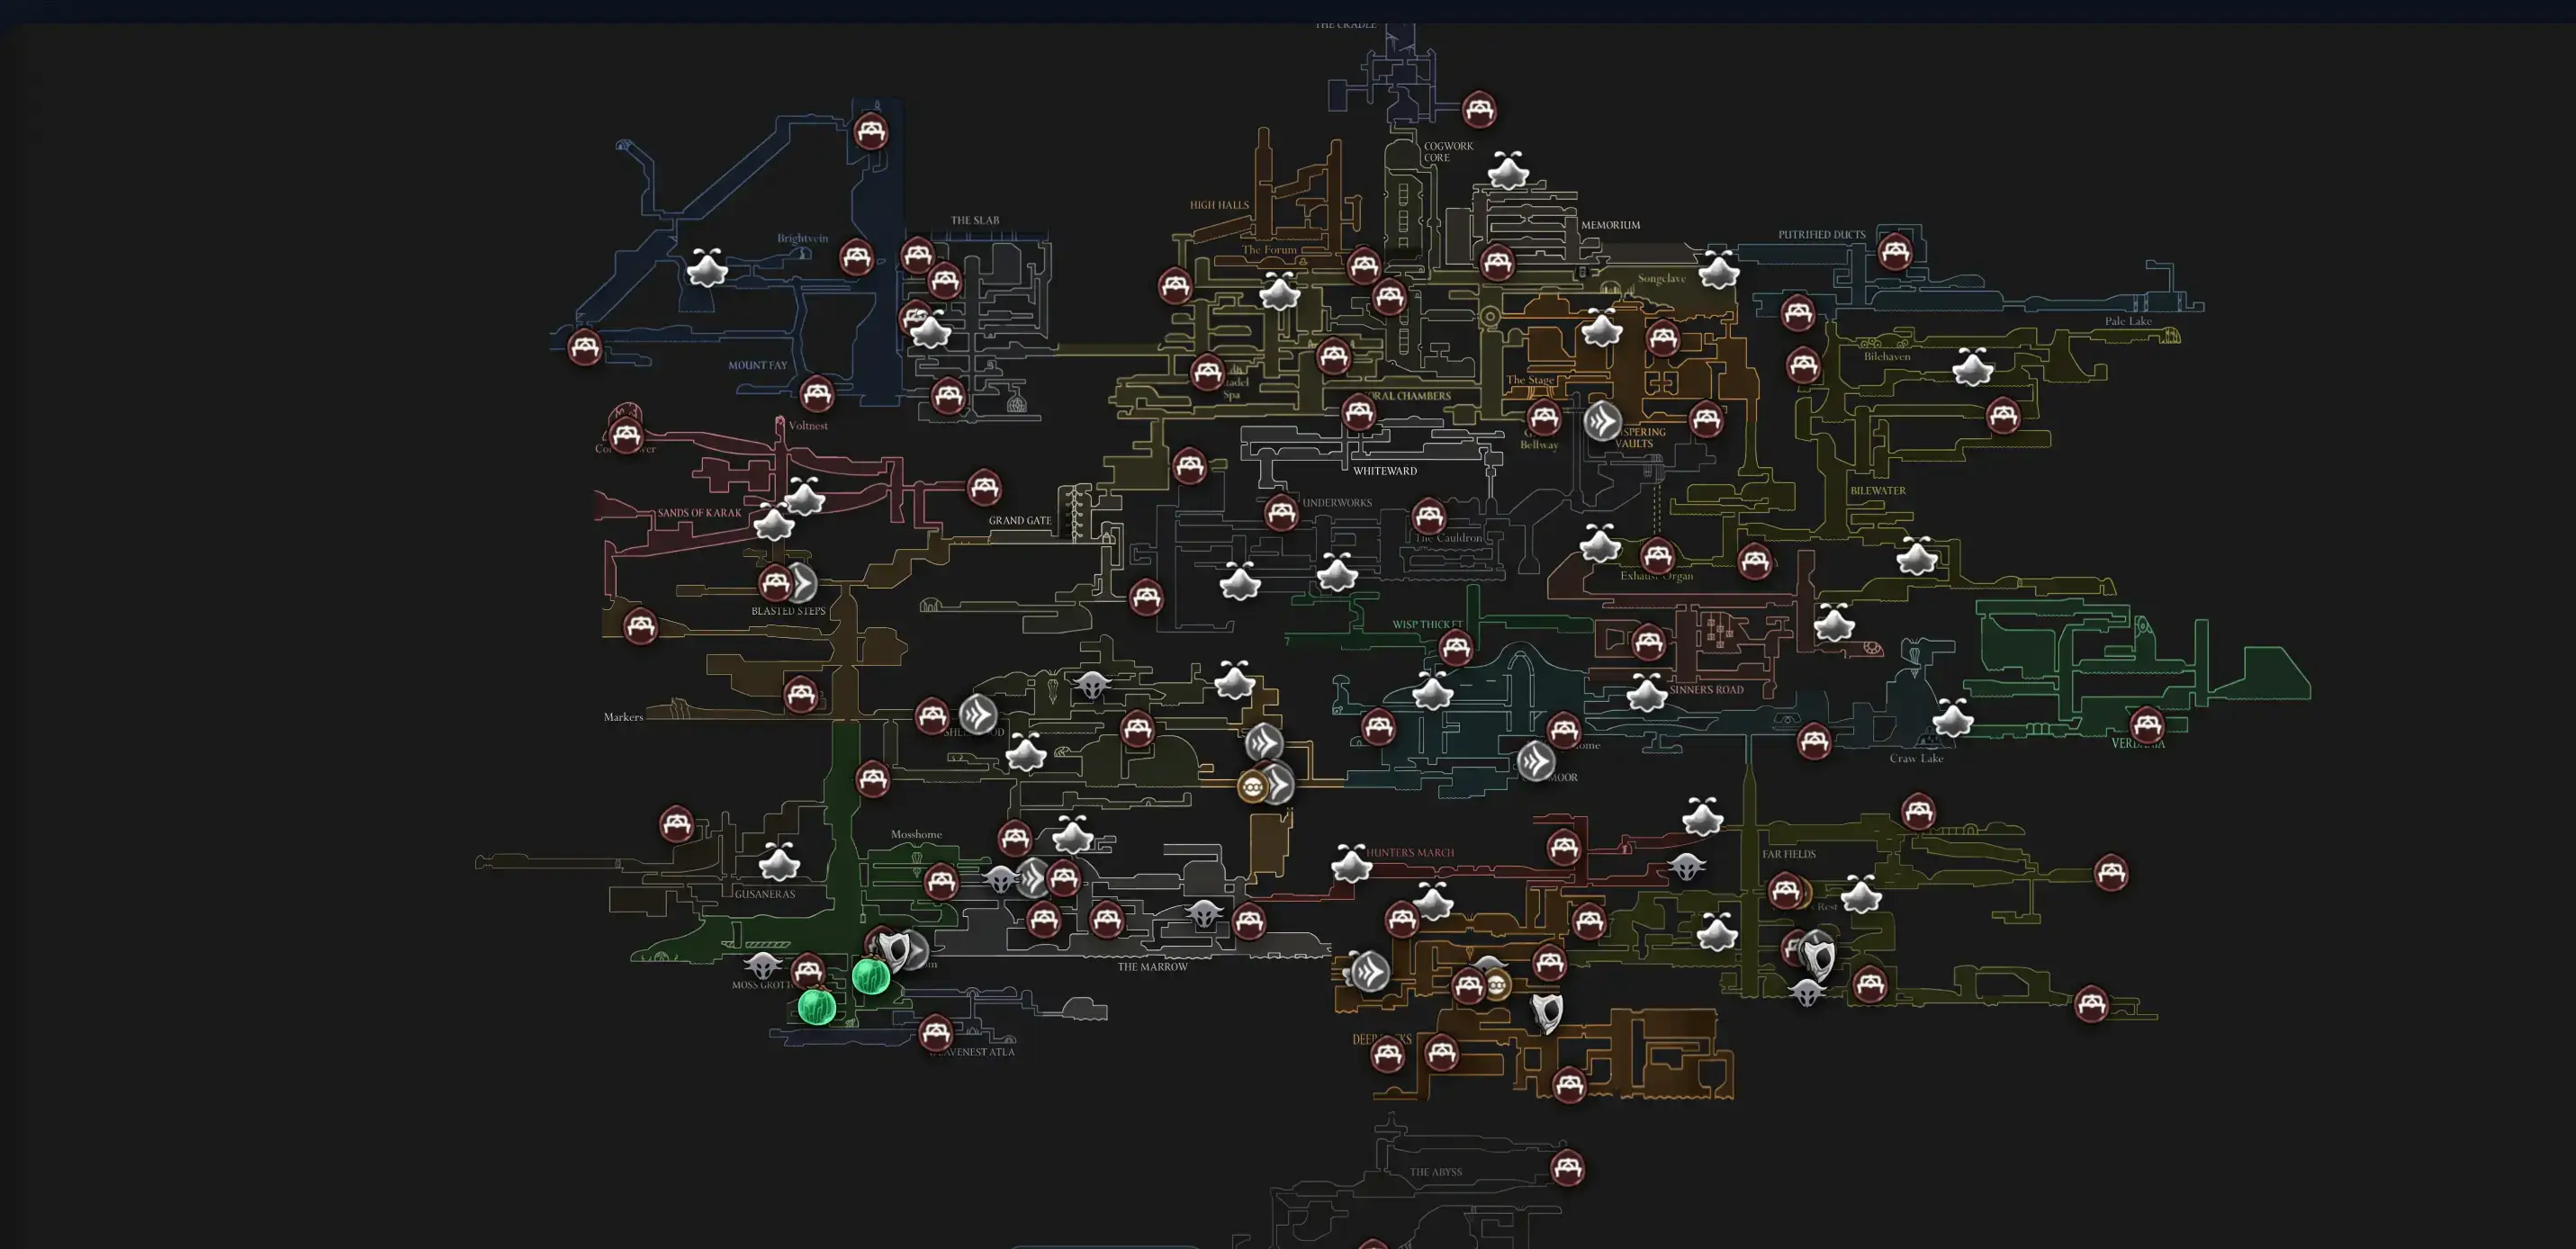
Open Interactive Map (All Areas)
Opens the full interactive Silksong map in a new tab.